
Introduction
In the previous post we cobbled together an SDL2 project in Xcode 9. We have a very simple program that starts up, initialises the SDL2 framework and then shuts down. This gets us over the initial hurdle of setting up a game project but we are still along way off from having a working game. In this second part, I will be writing a simple game loop using SDL2. If you don’t know what a game loop is, or need a refresher, go ahead and read about it in Game Programming Patterns. The game loop is an important foundation of any game engine and its important to get right. I plan to develop this over two articles, in the first (This one) we’ll get the basic loop in place. Then in part 2, we’ll refactor the basic loop into something more maintainable. Anyway, without further ado, let’s get started.
Our First Window
At this point we have initialised SDL but not actually put anything onscreen. We’re going to need a window before we can do anything. We create a window using the SDL_CreateWindow function, which returns a pointer to an SDL_Window instance. In the demo project from the previous tutorial, add the following lines, immediately after the call to SDL_Init.
SDL_Window *window = SDL_CreateWindow("Demo Game",
                                      SDL_WINDOWPOS_UNDEFINED,
                                      SDL_WINDOWPOS_UNDEFINED,
                                      640,
                                      480,
                                      SDL_WINDOW_OPENGL);
if (window == nullptr)
{
  SDL_Log("Could not create a window: %s", SDL_GetError());
  return -1;
}
This just creates a window titled “Demo Game”, with a classic VGA resolution (640 x 480) that will support OpenGL rendering (Not that we need it right now). After we do this we check that the window is created by checking for null, and exit the game if it hasn’t. I’ve never known it to not create the window but you never know. You can run this, and step through the code with a debugger if you like to see it working, but nothing will appear onscreen yet.
To get our window to appear before the game exits we can add a small delay into the program using SDL_Delay to pause execution as done in the example in the official documentation. However, that doesn’t seem to quite work as expected. To get the window to appear we have to give the system’s underlying event handlers a nudge by fetching an event. Events are things that happen to our game, usually as the result of some user input, like keyboard presses or mouse clicks. We retrieve events from the operating system and then process them in our game loop. We must retrieve a single event using SDL_PollEvent to get our window to appear before we wait.
Add the following lines after the window creation code:
// Get an event
SDL_Event event;
SDL_PollEvent(&event);

// Wait a bit
SDL_Delay(3000);
The SDL_PollEvent call fetches one event from the underlying event queue, I assume this is needed in order to force the underlying Cocoa code to complete some operation to show the window. We may or may not get some information added to our event, but we don’t really care. SDL_Delay takes a value in milliseconds to specify the time to wait. If you run this now you should see the window appear in all its glory!
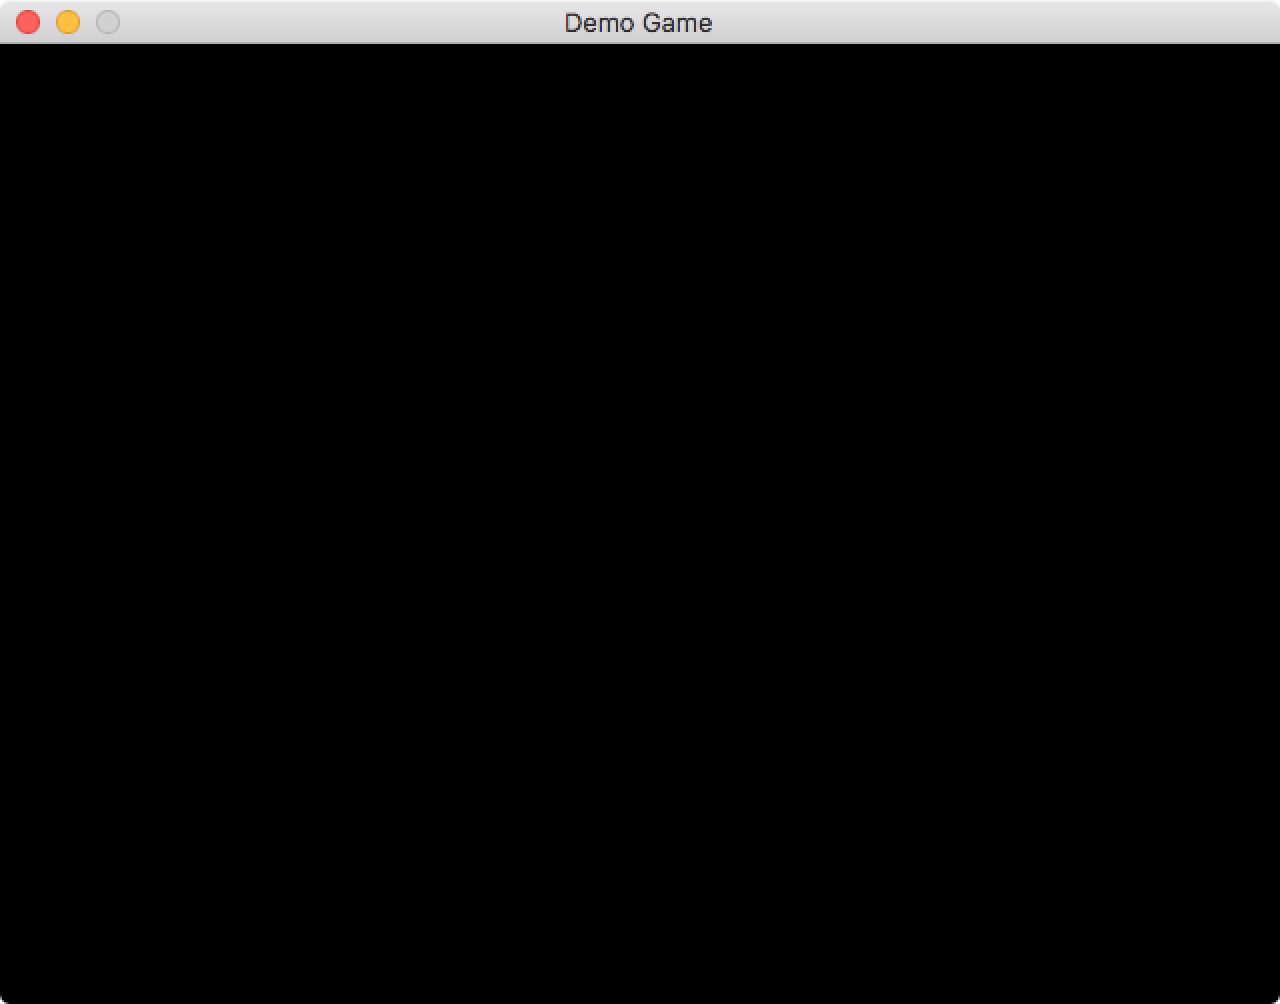
It ain’t pretty, but it works!
For completeness we need to dispose of the window before the game exits. We do this by passing our window to the SDL_DestroyWindow call. Add the call immediately above the existing call to SDL_Quit at the end of the main function.
// Tidy up
SDL_DestroyWindow(window);
SDL_Quit();

return 0;
One last thing to nail this bit just right. At this point if you have a Retina or other HDPI display like I do on my MacBook, the title of the window looks a bit fuzzy. We can fix this by adding a new entry to our info.plist file. Open the file by selecting it in the Project navigator, then add a new entry with the key set to “High Resolution Capable” and set the value to “YES”.
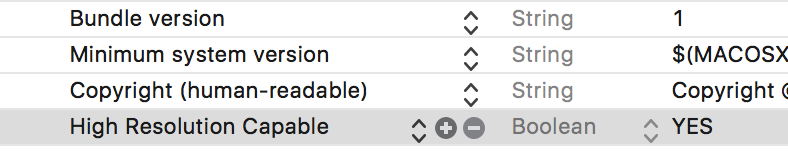
A necessary evil to fix fuzzy title syndrome
Now if you run the game again, you will see the improved output as our window now supports the HDPI display.
The Event Loop
So far we have a program that runs for 3 seconds and then quits without doing anything. To keep our window open we need to implement our actual game loop. Let’s replace the call to SDL_Delay with an infinite while loop. This will keep the game running forever, but obviously it’s not quite what we want, because if you run this the only way to quit the program is to force quit or kill it using the debugger. We need to wait for a special quit event, which will occur if the user clicks the window’s close button or otherwise tries to quit the application. When we receive the event we exit our infinite loop and let everything shut down.
We use the SDL_PollEvent function during the loop to continuously check for an SDL_QUIT event. Each time SDL_PollEvent is called it checks to see if an event is waiting, and if so, it populates the SDL_Event structure passed to it and returns true. If there’s no event it does nothing and returns false. So all we need to do is move the call to SDL_PollEvent into the loop and then check its return value. If we have an event and the “type” field is set to SDL_QUIT, then we have been asked to quit and we exit the loop.
Replace the calls to SDL_PollEvent and SDL_Delay with a while loop that looks like this:
while (true)
{
  // Get the next event
  SDL_Event event;
  if (SDL_PollEvent(&event))
  {
    if (event.type == SDL_QUIT)
    {
      // Break out of the loop on quit
      break;
    }
  }
}
Now when you run the game, the window will stay onscreen until you hit the close button, use the quit item in the application menu or press cmd+q. We now have a very basic game loop, well almost. To make this a proper game loop we need a bit more work.
Drawing To The Screen
Most games feature some sort of graphical element drawn to the screen so we need a way to put stuff in that big black box of a window we just created. To do this with SDL2 we need a new thing called an SDL_Renderer. We use the renderer to perform drawing operations to form the image to display in the window’s content area. After our call to SDL_CreateWindow has succeeded we can then use the window to create an SDL_Renderer that draws to it. To do this we pass the window to a call to SDL_CreateRenderer, which gives us our SDL_Renderer. We use the same pattern as before to check that the renderer was successfully created and exit the game if its hasn’t been.
SDL_Renderer *renderer = SDL_CreateRenderer(window, -1, SDL_RENDERER_ACCELERATED);
if (renderer == nullptr)
{
  SDL_Log("Could not create a renderer: %s", SDL_GetError());
  return -1;
}
A few things to note about the above call, which should be placed immediately after the window creation code. The -1 value is the index of the driver to use, this is an advanced feature that we don’t need, so just pass -1 to select the default driver of the system. The final SDL_RENDERER_ACCELERATED flag ensures that we are using hardware accelerated graphics, this is optional in our case, you can also pass 0 and it will select this as default but I include it to make it clearer what’s going to happen.
Now we have something to draw with, we need to add some drawing code. This code is added to the bottom of the game loop. After we have processed any events and then performed any other work to update our games state, we complete the iteration by outputting the state to the screen. For now we don’t have any code to do all that but we can draw something. We will erase the content of the renderer by calling SDL_RenderClear and then display it by calling SDL_RenderPresent.
// Set the color to cornflower blue and clear
SDL_SetRenderDrawColor(renderer, 100, 149, 237, 255);
SDL_RenderClear(renderer);

// Show the renderer contents
SDL_RenderPresent(renderer);
The above code should appear right at the end of the loop. You will notice I am calling SDL_SetRenderDrawColor that is used to set the colour used when filling the image by specifying values for the red, green, blue and alpha colour components. After clearing, calling SDL_RenderPresent causes the image to be flipped to be moved from memory into the window’s content buffer (See this Wikipedia article on buffering if you’re interested). The result should be if you run the game now you should see a pretty blue background instead of the original black.

A really yucky random colour
The last thing to do is to dispose of the renderer outside of the loop by adding a call to SDL_DestroyRenderer immediately before the call to destroy the window. Your tidy up code should end up looking like this:
// Tidy up
SDL_DestroyRenderer(renderer);
SDL_DestroyWindow(window);
SDL_Quit();

return 0;
The Update
There’s one final thing missing to make this a legitimate game loop. I said earlier, that after reading event we should process our game logic to update the games state. The update phase of the loop is where we can move our game characters, set up our animations and really make our game play. To demonstrate this we will modify the loop so it does something; each frame we shall change the background colour. We’ll do this by generating random values for the red, green and blue colour components passed SDL_RenderDrawColor using the rand function from the C standard library.
// Randomly change the colour
Uint8 red = rand() % 255;
Uint8 green = rand() % 255;
Uint8 blue = rand() % 255;

// Fill the screen with the colour
SDL_SetRenderDrawColor(renderer, red, green, blue, 255);
SDL_RenderClear(renderer);

SDL_RenderPresent(renderer);
If you replace the drawing code in the loop with the above and run the game you will see the window now flashes through lots of random colours. Don’t worry if you see more than one colour at one, this is because the updates are happening so fast that you are seeing the new content displayed before the old content is cleared. As a challenge you could attempt to slow things down to prevent the flicker (I’ll give you a clue, we already know a way to make the application wait for a fixed time). Anyway, this demonstrates that each iteration (Or frame) of our game loop we can update the state and then display that state to the player. In a real game that colour generation code would be our game logic.
Done
That’s it. Now we’ve put together a simple SDL2 game loop. At this point we have all the basics and could start to write our next blockbuster game. While we could do that, actually we’re likely to make a mess. The current code is functional but isn’t well designed, so in part 2, we’ll build on this foundation to create the basic architecture for our game engine. As always, you can download the code from the project’s Github repository using this link – SDL2-Tutorials – Writing An SDL2 Game Loop.
Let me know how you get on in the comments, feel free to ask questions or make suggestions for what you’d like to see in a future instalment.
